
Blog
Gummi coupling assembly and disassembly: step-by-step maintenance guide
Correct assembly and disassembly of Gummi couplings defines their service life. We review tools, key steps and the errors that most shorten coupling life.
Technical team at MR Accesorios Industriales · Updated on October 25, 2026
What a Gummi coupling is and why assembly defines its life
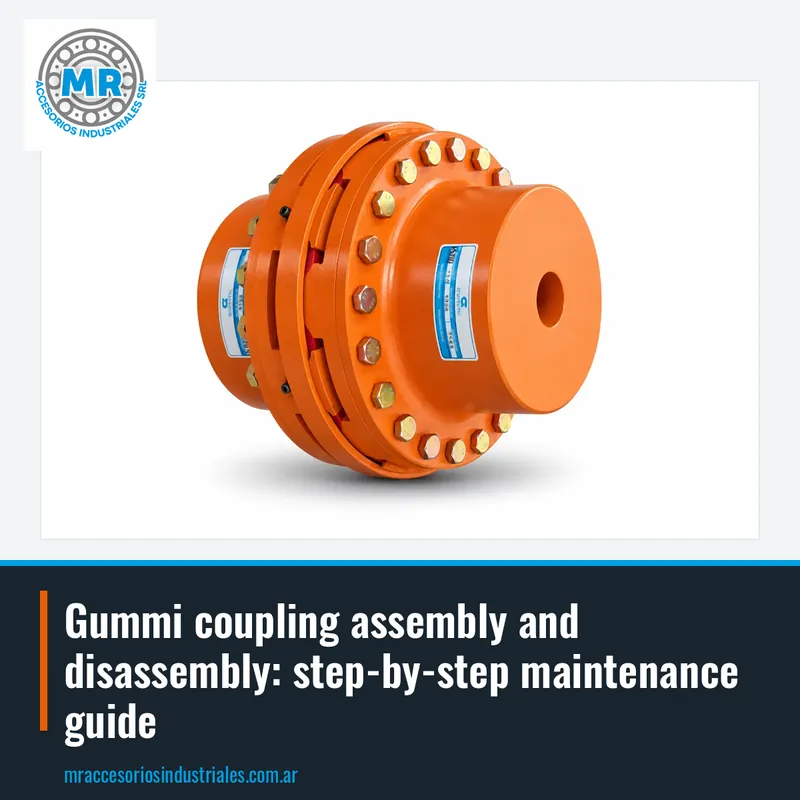
A Gummi coupling is a power transmission element that connects two shafts and absorbs misalignments, vibrations and shocks. Its elastic rubber body works in compression and shear, and if it is assembled forced or misaligned, wear appears quickly. In Argentine industry it is used in pumps, compressors, gearboxes, conveyor belts and mixers, among other equipment. Correct assembly and disassembly is as important as choosing the model.
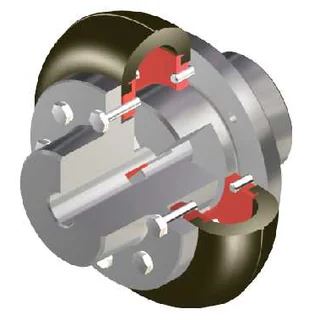
The coupling consists of two metal masses, generally cast iron or steel, and an intermediate elastic element. The masses are fixed to the shafts by keyways, set screws or press fit, depending on the design. The elastic element can be one piece or several sections, and it is the one that transmits torque while compensating for small misalignments. If assembly does not respect the admissible misalignment limits, the rubber works under excessive stress and cracks prematurely.
In maintenance, the Gummi coupling is inspected at each scheduled shutdown or when abnormal vibrations appear. A neat assembly, with aligned shafts and controlled tightening torque, avoids unexpected stops and reduces spare parts cost. Therefore, before touching a coupling it is advisable to review the basic steps and have the right tools at hand. In this guide we review the general procedure and the most common errors we see in plants.
Tools needed to assemble and disassemble Gummi couplings
Working with Gummi couplings does not require special tools, but some basic workshop tools are needed. A set of open-end and Allen wrenches, a torque wrench, a two- or three-leg puller, a caliper or micrometer to measure shafts and a dial indicator for alignment. It is also advisable to have an induction heater or an oven to expand the masses when the fit is press fit. Cleaning with degreaser and a clean cloth is part of the procedure.
The puller is key to disassembling masses that are press-fitted with interference. You should never hit the mass or the elastic element directly with a steel hammer, because the support races deform and the rubber is damaged. If the fit is with keyway and set screw, it is enough to loosen the set screw and slide the mass with a soft puller. For the elastic element, it can often be removed by hand or with the help of a plastic lever.
The torque wrench is essential to respect the tightening torque of the fixing screws. Excessive tightening can crack the mass or deform the keyway, and insufficient tightening causes play and premature wear. The recommended torque values are in the manufacturer's catalog or on the coupling drawing. If they are not known, you can start from general tables for the screw diameter and grade, but it is always advisable to validate them with the technical team.
Steps for correct assembly of Gummi couplings
Before assembling, verify that the shafts are clean, without burrs or hammer marks. Measure the shaft diameters and the mass bores to confirm the correct fit. If the fit is interference, heat the mass evenly to the temperature indicated by the manufacturer and slide it onto the shaft without forcing. If you use a keyway, check that the key seats well in its slot and does not remain raised at the ends.
First mount one mass on each shaft, leaving enough space to insert the elastic element. Then bring the equipment closer until the masses face each other with the correct separation, according to the model. Insert the elastic element without stretching or compressing it with tools. If the element is split, place the halves and join the closing bolts with the indicated torque. Verify that the element is centered and does not rub against the masses.
Finally, align the shafts with a dial indicator or ruler and feeler gauges, checking angular and parallel misalignment. The admissible tolerance depends on the size and type of coupling, but in general the goal is that the elastic element does not work twisted. Tighten the fixing screws to the recommended torque and turn the assembly by hand to detect rubbing or hard spots. Only then start up and monitor vibrations during the first hours.
Steps for safe disassembly of Gummi couplings
To disassemble, first lock out the equipment and cut the power. Loosen the mass fixing screws and carefully remove the elastic element, without prying on the edges. If the element is stuck due to dirt or heat, use a mild degreaser and a plastic spatula. Never use direct fire on the rubber, because it degrades and releases toxic gases.
If the masses are press-fitted with interference, use a leg puller resting on the hub, not on the rim. Heat the mass evenly if it is very firm, but avoid heating the shaft to prevent damage to nearby bearings. If the coupling has a tapered bushing, loosen the fixing screws and use the expulsion screws if the design allows it. Hitting the hub with a rubber hammer can help, but always with soft, protected blows.
Once the masses are disassembled, clean the shafts and check the condition of keyways, keys and seats. If you are going to reuse the elastic element, inspect it looking for cracks, permanent deformation or hardening. Any visible damage indicates that it must be replaced. Store the parts in a clean, dry place until the next assembly, and note the measurements or codes to order spare parts.
Common errors that shorten Gummi coupling service life
The most frequent error is assembling with excessive misalignment. Although the Gummi coupling tolerates some misalignment, exceeding the manufacturer's limits generates heat and fatigue in the rubber. Another error is forcing the elastic element with cutting tools or heating it so it fits, which damages the contact surface. It is also common to overtighten the fixing screws and deform the hub or keyway.
Not respecting the separation between masses is another typical problem. If the masses are too close, the element works compressed and loses its ability to absorb vibrations. If they are too far apart, the element can come out or work with play. The correct separation is in the coupling drawing or catalog, and is checked with feeler gauges or caliper. Many assemblies fail because this point is not verified.
Using an elastic element of the wrong size or from another manufacturer also shortens service life. Although it may look similar, the hardness and internal geometries vary. Therefore it is advisable to order the spare part with the code engraved on the mass or on the element itself. At MR we help you identify the correct model from a photo or the shaft measurements.
How to identify the Gummi coupling and order the correct spare part
Gummi couplings usually have the model code engraved on the masses. That code identifies the size and series, and is the most important data for ordering spare parts. If the engraving is blurred, you can measure the outer diameter of the mass, the bore diameter and the total width. With those measurements and a photo, at MR we help you identify the model.
The elastic element may also have its own code or the same coupling code. In some cases, the element is ordered separately and it is advisable to note its number before disassembling. If the coupling is very damaged and nothing can be read, you can resort to the equipment manual or the assembly drawing. Measuring the distance between centers of the element fixing holes also helps.
To request a quote, send the coupling code, shaft measurements and a photo of the assembly by WhatsApp or email. If the coupling is in service, indicate the equipment power and speed to validate the selection. We quote the complete coupling or only the elastic element, according to what you need. We also advise you on assembly.
Preventive maintenance: when to inspect and replace the elastic element
The elastic element is the wear part of the Gummi coupling. It is recommended to inspect it at each scheduled shutdown, according to service hours and working conditions. Look for surface cracks, permanent deformation, hardening or loss of elasticity. If the rubber looks shiny or sticky, it may be suffering chemical attack or excessive temperature.
A clear symptom of wear is increased vibration or noise in the coupling. Angular play can also be detected when moving the shafts with the machine stopped. If rubber dust is observed around the coupling, it is a sign of wear due to friction or misalignment. In those cases it is advisable to stop and inspect before the damage advances to the masses or bearings.
Replacing the elastic element is simple and does not require disassembling the masses in most models. It is enough to separate the equipment, remove the old element and place the new one respecting the correct separation. It is always advisable to take the opportunity to check alignment and screw torque. With orderly preventive maintenance, the Gummi coupling lasts much longer and avoids costly stops.
Frequently asked questions
How do I know if my Gummi coupling is misaligned?
A misaligned coupling generates vibrations, noise and premature wear of the elastic element. It can be checked with a dial indicator or ruler and feeler gauges, measuring angular and parallel misalignment. If the rubber cracks on one side or rubber dust appears, there is probably misalignment.
Can I replace only the elastic element of my Gummi coupling?
Yes, in most models the elastic element is sold separately and can be replaced without disassembling the masses. You only need to separate the equipment, remove the old element and place the new one respecting the correct separation between masses. It is always advisable to check alignment after the change.
What tools do I need to disassemble a Gummi coupling?
You need open-end and Allen wrenches, a leg puller, a torque wrench and, if the fit is press fit, an induction heater or an oven. Never hit the mass or rubber directly with a steel hammer. Use a puller and even heating to avoid damaging the parts.
How do I identify the model of my Gummi coupling to order spare parts?
Look for the code engraved on the masses. If it cannot be read, measure the outer diameter, the bore and the total width, and take a photo. With that data at MR we help you identify the model and quote the spare part.
How often should I inspect the elastic element of a Gummi coupling?
It is recommended to inspect it at each scheduled shutdown, according to service hours. Look for cracks, deformation, hardening or rubber dust. If vibrations or noise appear, inspect earlier. Preventive replacement avoids damage to the masses and unexpected stops.
Products with photos in the catalogue
Keep reading
- GUMMI Couplings: Vibration Absorption and Reliable Power Transmission for Industry
GUMMI elastic couplings absorb vibrations and misalignments, protect machinery, and ensure reliable power transmission. Learn about their configurations and how to choose the right model.
- How to Read Gummi Codes: Designation Structure, Prefixes, Suffixes and Real Examples
Practical guide to understand Gummi coupling nomenclature. Decode codes and designations to identify the correct coupling for your application.
- Gummi Couplings: applications, selection and maintenance to make them last
Discover where Gummi couplings are used, how to choose the right model for your application and the best assembly and maintenance practices to extend their service life.
Continue here
Need a GUMMI quote?
Send us the GUMMI part number, the size or a photo of the part and we will get back to you with a quote.