
Blog
EMMAR Assembly and Disassembly: Tools, Steps, and Common Mistakes That Shorten Service Life
Practical guide to assemble and disassemble EMMAR pulleys and roller chains without damaging components. Includes steps, tools, and common mistakes.
Technical team at MR Accesorios Industriales · Updated on October 17, 2026
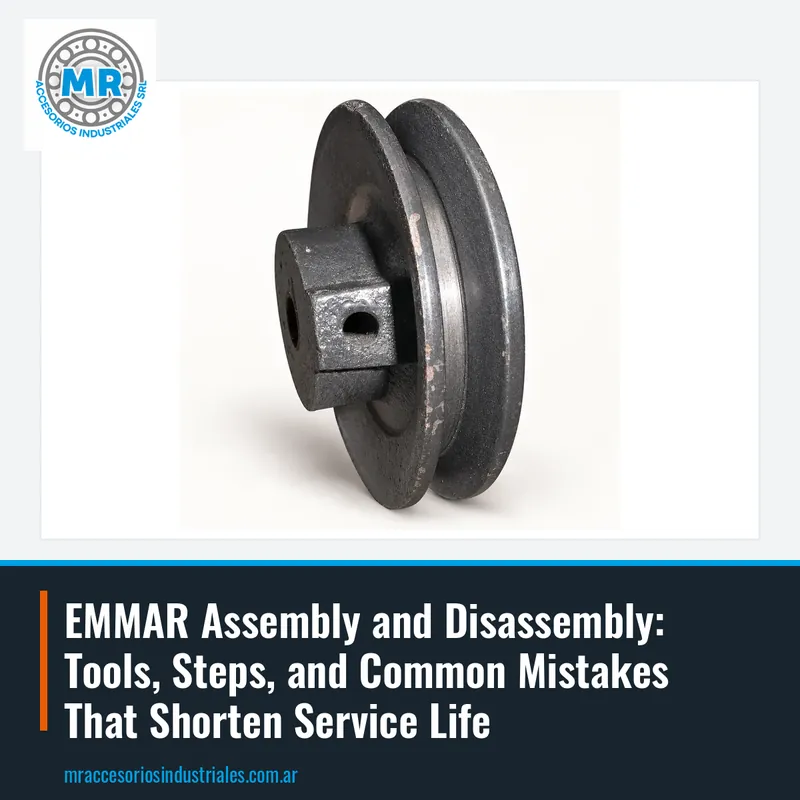
Why correct assembly defines the service life of an EMMAR pulley or chain
The assembly and disassembly of EMMAR pulleys and roller chains is a task that seems simple but hides details that make the difference between a transmission that lasts for years and one that fails within weeks. Poor assembly generates misalignments, vibrations, and premature wear on components. Therefore, before starting, it is worth understanding what is being installed and how it should be aligned. In this guide, we review the key steps and the most common mistakes so you can do the job safely.
EMMAR pulleys are manufactured by MR and are used in belt drives in all types of industrial machinery. EMMAR roller chains, on the other hand, transmit power in conveyors, elevators, and agricultural equipment. Both products require careful assembly: an off-center pulley or a poorly tensioned chain generates irregular loads that shorten the service life of the entire system. That's why in this note we tell you how to do it right.
A frequent mistake is forcing parts with blows or inappropriate tools. Both pulleys and chains have precise tolerances: a blow can deform the pulley groove or damage the chain links. Instead of improvising, it is best to follow an orderly procedure and use suitable pullers or adjustment tools. This protects the investment and avoids unscheduled downtime.
Tools needed to assemble and disassemble EMMAR pulleys
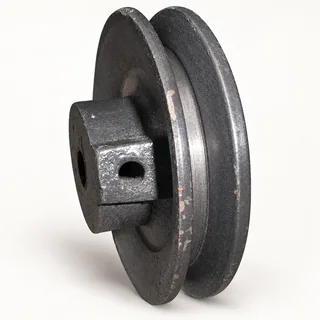
To assemble or disassemble an EMMAR pulley, you need basic workshop tools: open-end or socket wrenches, a three-jaw pulley puller, a caliper or micrometer to verify diameters, and a level or ruler to check alignment. It is also useful to have a torque wrench to tighten the fixing screws to the recommended torque. No special equipment is needed, but tools in good condition are necessary to avoid damaging the parts.
The pulley puller is key to disassemble without blows. It rests on the pulley hub and pushes the shaft outward evenly. If you don't have a puller, you can use two opposing pry bars, but be very careful not to deform the groove. Never hit the pulley directly with a hammer: cast iron or steel can chip or crack. A poorly placed blow can ruin a new pulley.
For assembly, it is essential to clean the shaft and the pulley bore before placing it. Any burr or dirt prevents correct seating and generates vibrations. If the pulley fits very tightly, the hub can be slightly heated with a torch, but without exceeding: excessive heat alters the material properties. Then slide it to the desired position and fix it with set screws or keyways according to the design.
Steps to assemble an EMMAR pulley without misalignments
The first step is to verify that the shaft and the pulley bore have the correct dimensions. Before assembling, measure the shaft diameter and compare it with the pulley bore. If there is a difference, do not force it: write to us and we will quote the exact size.
Then, place the pulley on the shaft aligning the keyway if applicable. Use an inverted puller or a tube that rests only on the inner hub to push it gently. As it enters, check that it is perpendicular to the shaft. Once in position, tighten the fixing screws in a cross pattern and to the recommended torque. Finally, verify alignment with a metal ruler resting on the side faces of both pulleys: they must be coplanar.
A common mistake is over-tightening the set screws, which deforms the hub and misaligns the pulley. Another is not checking alignment after a few hours of operation: initial vibrations can loosen the fixings. Therefore, after the first start-up, it is advisable to stop the machine and recheck tightness and alignment. This simple habit prevents irregular wear on belts and bearings.
How to disassemble an EMMAR pulley without damaging the shaft or pulley
To disassemble an EMMAR pulley, first loosen the fixing screws and remove them completely. If the pulley is on a shaft with a key, remove the key with a small puller or a brass punch. Then place the three-jaw puller so that the jaws grip the pulley hub from behind, not the groove edge. Tighten the central screw of the puller against the center of the shaft and start turning slowly.
It is important that the puller is well centered so that the force is distributed evenly. If the pulley is very rusty or stuck, apply penetrating lubricant to the joint and let it act for a few minutes. Never use direct heat on the pulley if it is near bearings or seals: heat transfers and can damage them. If it does not come off with the puller, do not hit it: consult a specialist.
Once disassembled, clean the shaft and check its surface for scratches or deformations. If the shaft is damaged, the new pulley will not seat well and will fail again. Take the opportunity to inspect the pulley groove: if it has cracks or uneven wear, it is time to replace it. At MR we quote EMMAR pulleys just by giving us the code or measurements.
Assembly and disassembly of EMMAR roller chains: what you need to know
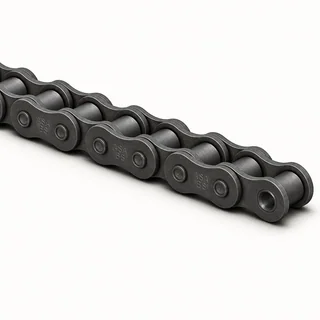
EMMAR roller chains, such as series 10-B1 or 20-B1, are assembled by joining their ends with a connecting link or clip. Before assembling, verify that the chain pitch matches that of the sprockets. An incorrect pitch causes jumps and breakages. Also check that the chain is not twisted or have stiff links: if it comes in a roll, unwind it carefully to avoid twisting.
To join the ends, place the connecting link with the clip open in the direction of chain travel. The clip must have the closed part facing forward, so that centrifugal force does not detach it. Use suitable pliers to open and close the clip without deforming it. Never use a screwdriver and a hammer: it is the fastest way to ruin the link and cause premature failure.
Disassembly of an EMMAR chain is done by removing the clip from the connecting link with needle-nose pliers. If the chain is very tight, first loosen the tensioner or move the shaft to give it slack. If it does not have a connecting link (because it was riveted), it can be cut with a chain cutter or grinder, but always marking the link to cut beforehand. After disassembly, clean the chain and check the wear of rollers and plates.
Common mistakes that shorten the service life of EMMAR pulleys and chains
One of the most frequent mistakes is misalignment between pulleys or between sprockets. Misalignment generates lateral loads that prematurely wear the flanks of belts and the sides of links. In pulleys, misalignment is noticed because the belt comes out of the groove or frays at the edges. In chains, shiny wear is seen on the inner plates. Always verify alignment with a ruler or a laser.
Another mistake is incorrect tension of the chain or belt. A chain that is too tight overloads the bearings and teeth; too loose, it jumps and hits. Correct tension is measured at the center of the slack span: there should be a moderate deflection, according to what the equipment manufacturer indicates. In belts, tension is verified by pressing with a finger: the belt should yield a little without feeling soft.
It is also common to use inappropriate lubricants or not lubricate. Roller chains need lubrication to reduce internal friction between pins and bushings. A very heavy oil does not penetrate; a very light one runs off. Use a specific chain lubricant or a medium-viscosity mineral oil. In pulleys, lubrication does not apply, but cleaning does: dust and grease accumulated in the groove make the belt slip and generate heat.
When to replace an EMMAR pulley or chain and how to order it
An EMMAR pulley should be replaced when the groove shows visible wear, cracks, or deformations. If the belt sinks into the groove and touches the bottom, the pulley no longer transmits correctly. Also if there are vibrations that are not corrected with alignment. In chains, wear is measured by elongation: if the chain has visibly stretched relative to its original length, it must be changed along with the sprockets.
To order a new EMMAR pulley or chain, the most practical is to send the code engraved on the part or a photo with a reference measurement. For example, 10-B1. If the code is not readable, measure the outer diameter and groove width on pulleys, or the pitch and inner width on chains. With that data, at MR we quote the exact replacement.
Remember that correct assembly is as important as the quality of the component. A well-installed and maintained EMMAR pulley or chain will give you prolonged service. If you have doubts about the procedure or need spare parts, write to us via WhatsApp or email with your equipment data. We help you identify the part and send you the quote promptly.
Frequently asked questions
How do I know if an EMMAR pulley is properly aligned?
Rest a straight metal ruler on the side faces of both pulleys. It should be in full contact with both faces. If there is light at any point, there is misalignment. You can also use an alignment laser for greater precision.
What puller should I use to disassemble an EMMAR pulley?
A three-jaw puller with jaws that grip the pulley hub, not the groove edge. Center it and turn slowly. If the pulley is rusty, apply penetrating lubricant before extracting.
How do you join an EMMAR roller chain?
It is joined with a connecting link or clip. Place the clip with the closed part facing the direction of chain travel. Use suitable pliers to open and close the clip without deforming it.
How often should I check the tension of an EMMAR chain?
It is advisable to check it periodically and at any abnormal noise, especially after the first start-up. A poorly tensioned chain wears out quickly.
What data do I need to quote an EMMAR pulley or chain?
Send us the code engraved on the part (for example, 10-B1) or a photo with a reference measurement. If it is not readable, measure diameter and width on pulleys, or pitch and inner width on chains.
Products with photos in the catalogue
Keep reading
- EMMAR Industrial Pulleys: Power Transmission Solutions for Argentine Industry
EMMAR industrial pulleys are manufactured in Buenos Aires, Argentina with sections A, B and C, in different numbers of grooves and also custom-made. Discover the options for your transmission system.
- How to Read EMMAR Codes: Designation Structure, Prefixes, Suffixes, and Real Examples
Understanding the nomenclature of EMMAR pulleys and chains helps you identify the correct replacement part. We explain how the codes are composed and what each part means.
- EMMAR: applications, selection and maintenance for lasting performance
EMMAR is MR's own brand for pulleys and roller chains. Learn where they are used, how to select them and maintain them to extend their service life.
Continue here
Need a quote?
Send us the code, size or a photo of the part and we'll quote you shortly.